

Why Fast Video Conversion?
Often in the middle of production, it’s really important to be able to capture videos and convert them quickly to formats for sharing. For me, I often need to quickly convert videos to either MP4 format, or to animated GIFs for sharing quickly on Slack. It may seem picky, but even opening an application such as HandBrake or Adobe Media Encoder can really slow me down. My go-to for video conversion is usually FFmpeg, since you have full control over the conversion parameters, but opening up a command window typically slows me down as well.
I have a great solution that I’ve been using, which is just to add some nice preset ffmpeg commands to the right-click context menu in Windows Explorer.
Warning
Now, in order to do this, you will need to make changes to your registry. If you don’t feel comfortable with this, you may want to stop right here :-)
Modifying the Windows Registry can be risky. Incorrect changes can cause system instability or other issues. Please back up your registry or create a system restore point before proceeding.
Installing FFmpeg
- Download FFmpeg from here.
- Extract it and put it somewhere on your computer like
C:\ffmpeg, so that your path to the executable isC:\ffmpeg\bin\ffmpeg.exe - (optional) Add your bin folder (e.g.
C:\ffmpeg\bin) to your environment PATH variable, so that you can always just run “ffmpeg” from any command window
Add Registry Keys
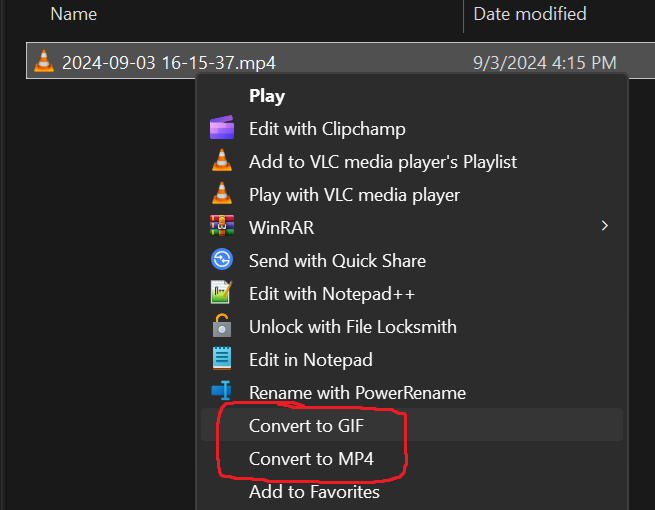
Now, we’re going to add two commands in the context menu, “Convert to MP4”, and “Convert to GIF”. You can feel free to add more, or change these as you like.
- Press Win + R to open the Run dialog.
- Type regedit and press Enter. (If prompted by User Account Control, click Yes to allow access.)
- Navigate to the Registry Key
Computer\HKEY_CLASSES_ROOT\*\shell - Right-click on shell, select New > Key.
- Name the new key “ConvertToMP4”.
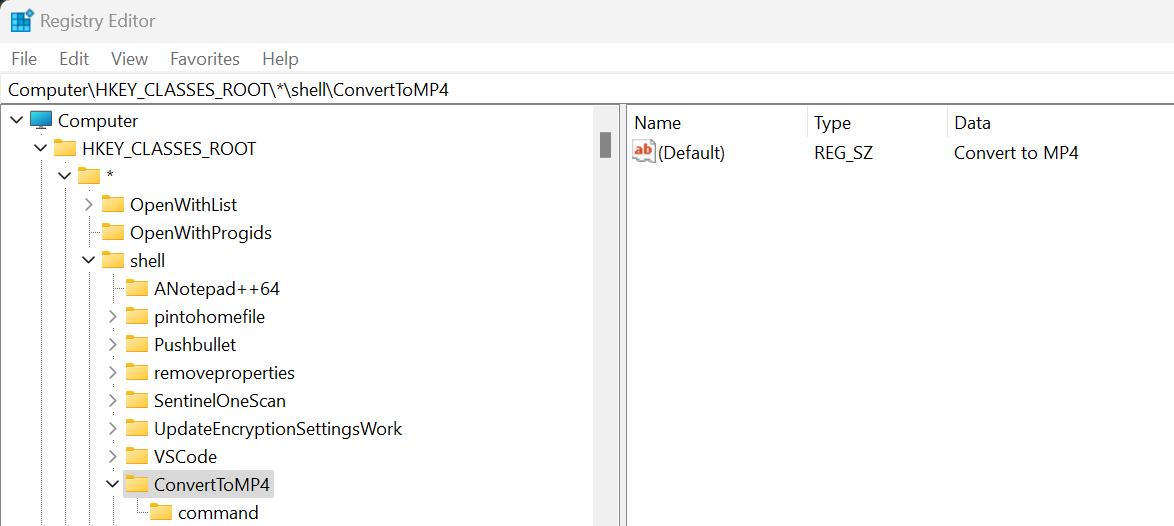
Click on the ConvertToMP4 key you just created, and in the right pane, double-click on the (Default) value. Enter
Convert to MP4. This is the name that will be displayed in the context menu.![Registry Editor]()
- Right-click on ConvertToMP4 and select New > Key.
- Name this new key
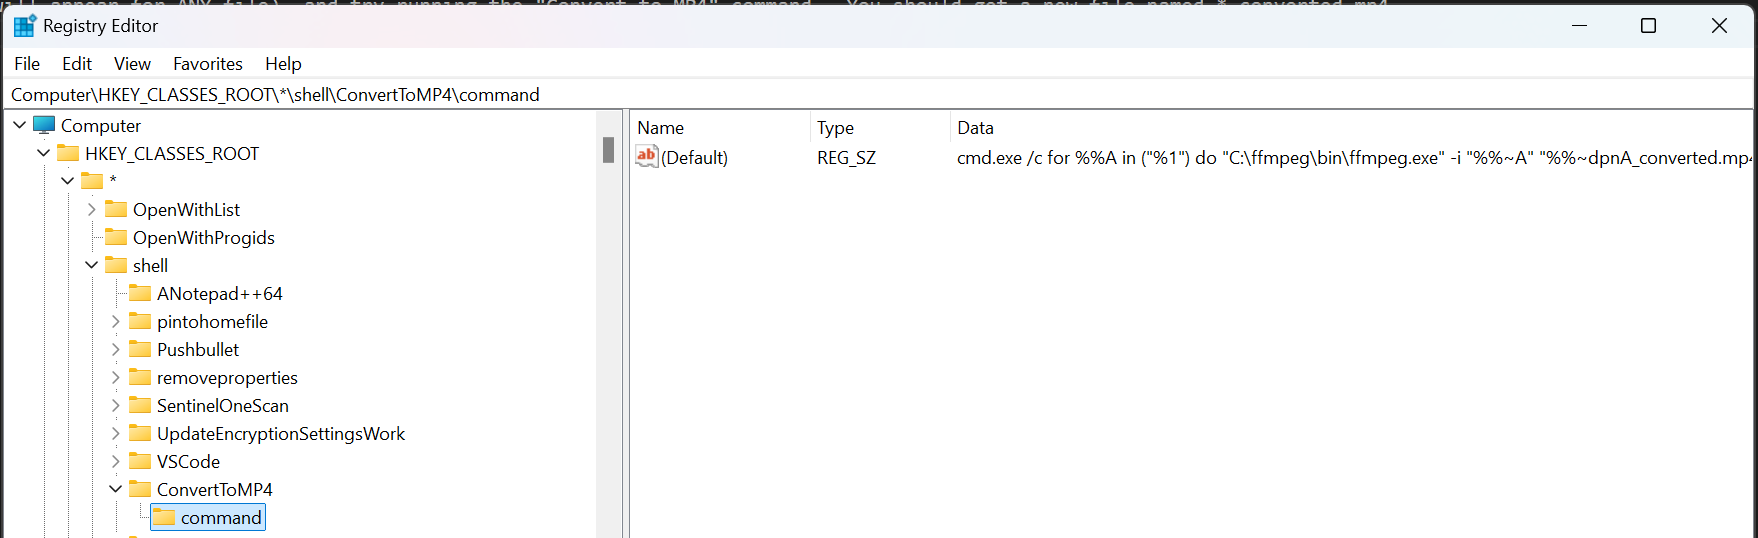
command. Click on the command key. In the right pane, double-click on the (Default) value. Enter the follow text:
1
cmd.exe /c for %%A in ("%1") do "C:\ffmpeg\bin\ffmpeg.exe" -i "%%~A" "%%~dpnA_converted.mp4"
Explanation:
cmd.exe /cstarts a new Command Prompt instance to run the command.- The for loop assigns the value of
%1(the selected file) to the variable%%A. %%~Aresolves to the full path of the input file without quotes.%%~dpnAresolves to the drive, path, and filename (without extension) of the input file.- ffmpeg takes the input file
-i "%%~A", converts it to MP4 format, and saves the output file as%%~dpnA_converted.mp4in the same directory.
![Registry Editor]()
- Close the Registry Editor
Testing It Out
Now, try right-clicking on any video file (the command will appear for ANY file), and try running the “Convert to MP4” command. You should get a new file named *_converted.mp4.
Repeat for GIFs
For GIFs, I recommend following the same steps, but use “ConvertToGIF” as the key name, “Convert to GIF” as the (Default) value, and then use the following command for a high-quality GIF:
1
cmd.exe /c for %%A in ("%1") do ("C:\ffmpeg\bin\ffmpeg.exe" -y -i "%%~A" -vf "fps=15,scale=480:-1:flags=lanczos,palettegen" "%%~dpnA_palette.png" && "C:\ffmpeg\bin\ffmpeg.exe" -i "%%~A" -i "%%~dpnA_palette.png" -lavfi "fps=15,scale=480:-1:flags=lanczos [x]; [x][1:v] paletteuse=dither=sierra2_4a" -loop 0 "%%~dpnA_converted.gif" && del "%%~dpnA_palette.png")
Explanation
-yOverwrites output files without asking for confirmation.-vf“…”: Applies video filters.fps=15sets the frame rate to 15 frames per second.scale=480:-1resizes the video to 480 pixels wide, maintaining aspect ratio (-1)flags=lanczosuses the Lanczos rescaling algorithm for high-quality scaling.palettegenGenerates a color palette from the video.%%~dpnA_palette.pngspecifies the output file for the palette.lavfiapplies complex video filters (lavfi stands for libavfilter).[x];labels the output of these filters as [x] for use in the next part.[1:v]the palette stream (second input file).paletteuseApplies the palette to the video.dither=sierra2_4auses the Sierra-2-4A dithering algorithm to improve visual quality.loop 0makes the GIF loop infinitely (use 1 for no looping)
Conclusion
I hope that helps you to create videos quickly on demand. Happy converting!